Why vacuum frying suits legumes
Chickpeas, broad beans and edamame are dense pieces that need time for heat to reach the centre. Deep frying browns and hardens the outside long before the inside turns crisp, and the pieces come out greasy. Vacuum frying solves both problems: under vacuum, water leaves the legume at a much lower temperature, so frying happens at only 80–100°C.
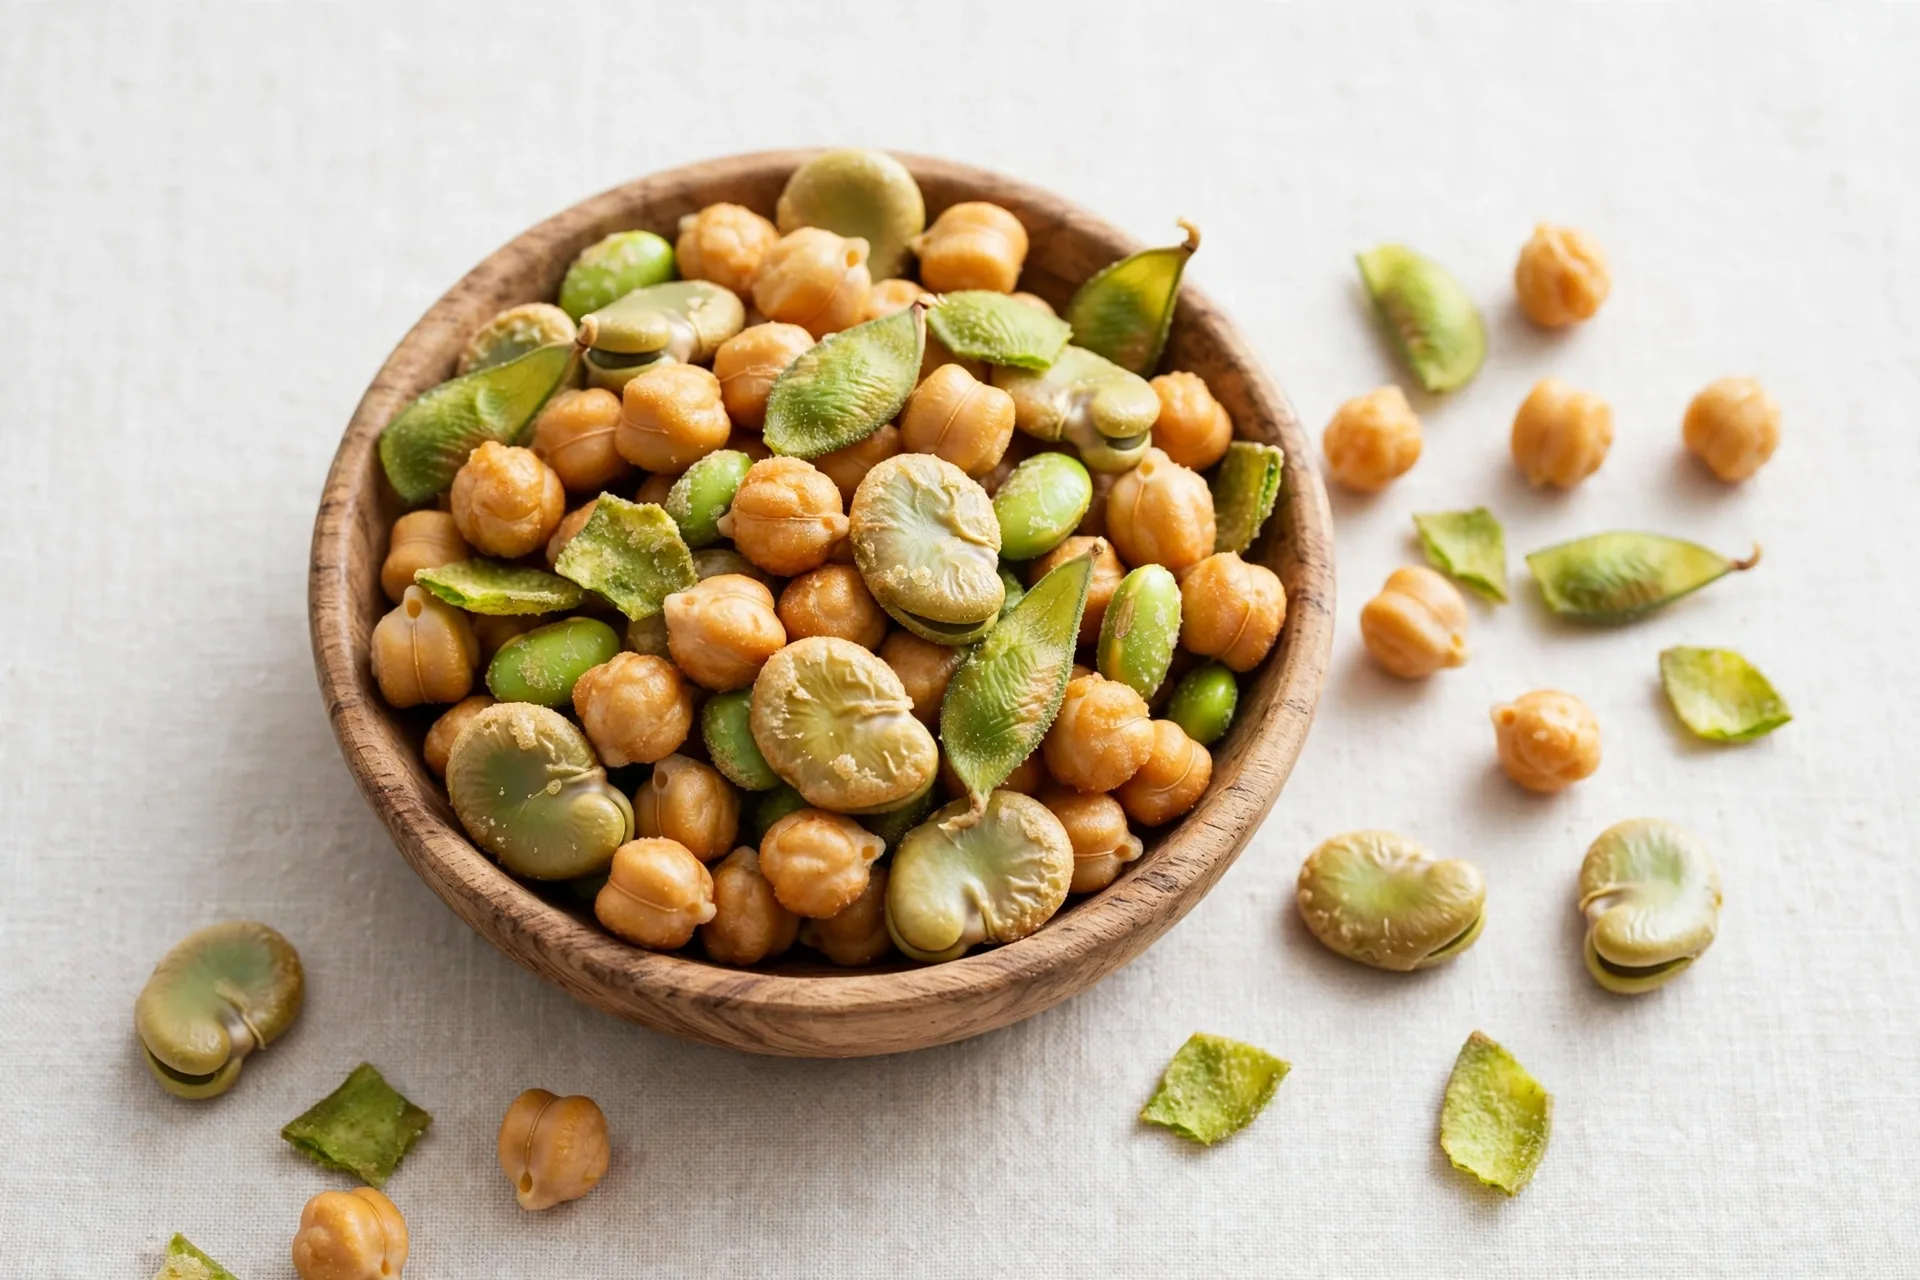
The lower temperature protects colour and flavour. Chickpeas keep their warm golden colour, broad beans stay pale and even, and edamame keeps its fresh green. The finished piece tastes of the legume itself — nutty and savoury — rather than of frying oil.
The second advantage is oil control. After frying, the basket spins inside the chamber and centrifugal force throws off surface oil. Finished vacuum fried legumes hold less than 18% oil, and a dry-to-the-touch piece takes seasoning better and keeps its crunch in the pack.
Which legumes work best
The best candidates hold their shape in hot oil and dry evenly from the inside out. Chickpeas, broad beans and edamame are the usual starting point; green peas and lentils can work too, but they are smaller and more fragile, so test them first.
Chickpeas
Chickpeas are the most forgiving place to start. They are round, even in size and firm enough to survive the basket and the spin without breaking. Dried chickpeas are the common raw material: they are soaked first, then drained and fried to a golden, crunchy piece.
Broad beans
Broad beans are larger and flatter than chickpeas, so they dry faster and need a single even layer in the basket — piled pieces fry unevenly and the ones in the middle stay soft. Dried broad beans are usually soaked before frying, and some producers split them first so the two halves dry at the same rate.
Edamame
Edamame is usually bought fresh or frozen, already shelled, so it needs no soaking — just thawing and draining if frozen. The beans are tender and green, so handle the basket gently and check the colour: the aim is a crisp bean that still looks green, not one fried until it turns brown.
Dried, fresh or frozen: which form to buy
Dried legumes are the cheapest to store and ship, but they need soaking and draining before frying. Fresh and frozen legumes skip the soaking step, but they cost more per kilogram and need cold storage. Do not mix varieties in one batch: a small edamame bean and a large chickpea never finish at the same time.
Preparation: sorting, soaking and blanching
Preparation decides more of the final quality than the fryer settings do: a well-prepared batch fries evenly, and a poorly prepared one cannot be saved by adjusting the oil.
Sort and grade first
Sort by size and remove broken pieces, shrivelled beans, stones and foreign material. One size grade per batch is the rule that matters most: pieces of the same size fry at the same rate, so the whole batch finishes together.
Soaking dried legumes
Dried chickpeas and broad beans are usually soaked in clean water until they are evenly hydrated, then drained well before loading. Soaking softens the inside so it dries evenly during frying. The exact soaking routine depends on the variety and the size of the bean, so agree it with your raw-material supplier and test it on your own product. Fresh and frozen edamame needs no soaking: thaw if frozen, then drain off surface moisture before loading.
Blanching is a product-dependent option
Blanching is standard for potato chips and fries and strongly advised for root vegetables, but it is usually not done for delicate fruits — for legumes it is a product-dependent option to verify. Some producers blanch broad beans briefly to even out the colour; others fry chickpeas and edamame with no blanching at all. Run a small batch with blanching and one without, then compare colour, crunch and surface oil before deciding.
A note on pre-freezing
Some producers freeze raw material before vacuum frying as an optional variant for certain products. For legumes it is not a standard or default step: dried legumes are soaked and fried without freezing, and fresh or frozen edamame is simply thawed. Do not build your process around pre-freezing unless your own testing shows a clear benefit.
The vacuum frying process at 80–100°C
Vacuum frying follows five steps: preparation, vacuuming, low-temperature frying, centrifugal de-oiling, and packing.
Loading the basket
Spread the legumes in a single even layer, with room for oil to circulate around every piece. Do not overload the basket to save a cycle: a crowded basket fries unevenly and oil cannot drain away properly.
Frying under vacuum
The basket is lowered into oil heated to 80–100°C while the chamber is held under vacuum. Under vacuum, water inside the legume boils off at a far lower temperature than in open air, so moisture escapes as gentle bubbles and the piece dries from the inside out.
Knowing when the batch is done
There is no fixed frying time: the right moment depends on the variety, piece size, moisture and load, so never copy a time from another product. Watch the bubbling slow, check the colour against your own reference sample, and break a piece open to check the centre.
Centrifugal de-oiling: the step that keeps oil below 18%
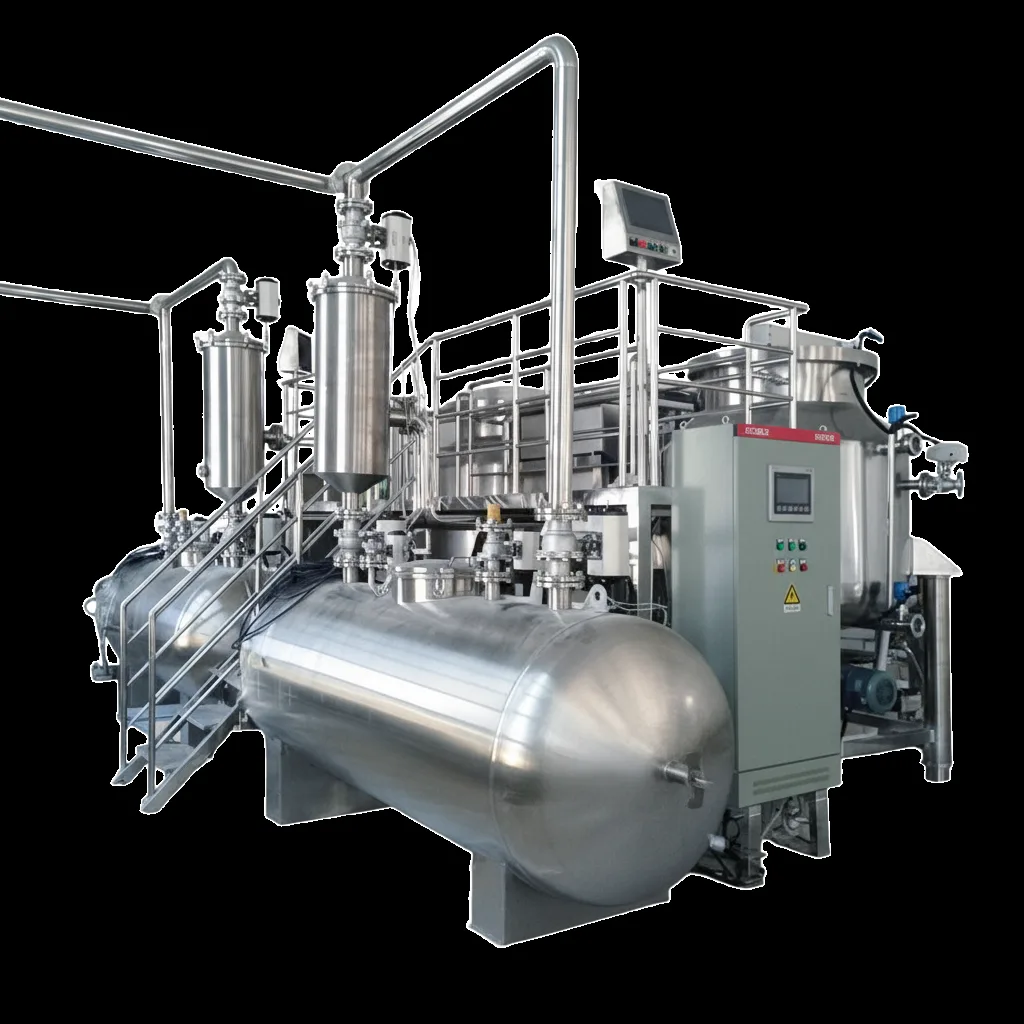
De-oiling is what makes vacuum fried legumes a low-oil product. As soon as frying ends, the basket lifts out of the oil and spins inside the chamber while the vacuum is still on, throwing surface oil off.
Timing matters: while the pieces are still hot, surface oil is thin and runs off easily; once they cool, it thickens and soaks back in. That is why the spin happens inside the chamber, immediately after frying.
Done properly, this keeps finished oil content below 18% — a result to verify on your own product, so check the oil content of your finished batches. If a batch comes out glossy or oily, check the spin, the load size and the oil temperature first. Handle the basket gently once the spin stops: hot legumes are crisp but fragile.
Seasoning and packing
Season while the pieces are still warm; pack as soon as they are cool enough to handle.
Seasoning after de-oiling
Season after de-oiling, never before: coatings applied before frying wash off in the oil or burn, while seasoning on the warm, dry surface after the spin sticks evenly. Salt, chilli, barbecue, cheese and wasabi-style blends all work on legumes — apply lightly and tumble gently for an even coat without breaking the pieces.
Packing promptly
Pack promptly: legume snacks absorb moisture from the air quickly, and even a short wait on an open bench in a humid room can soften the crunch. The pack must block moisture and oxygen, with a clean, firm seal — check it, since the seal is where most failures happen. Label each pack as the destination market requires.
Choosing a vacuum fryer for legume snacks
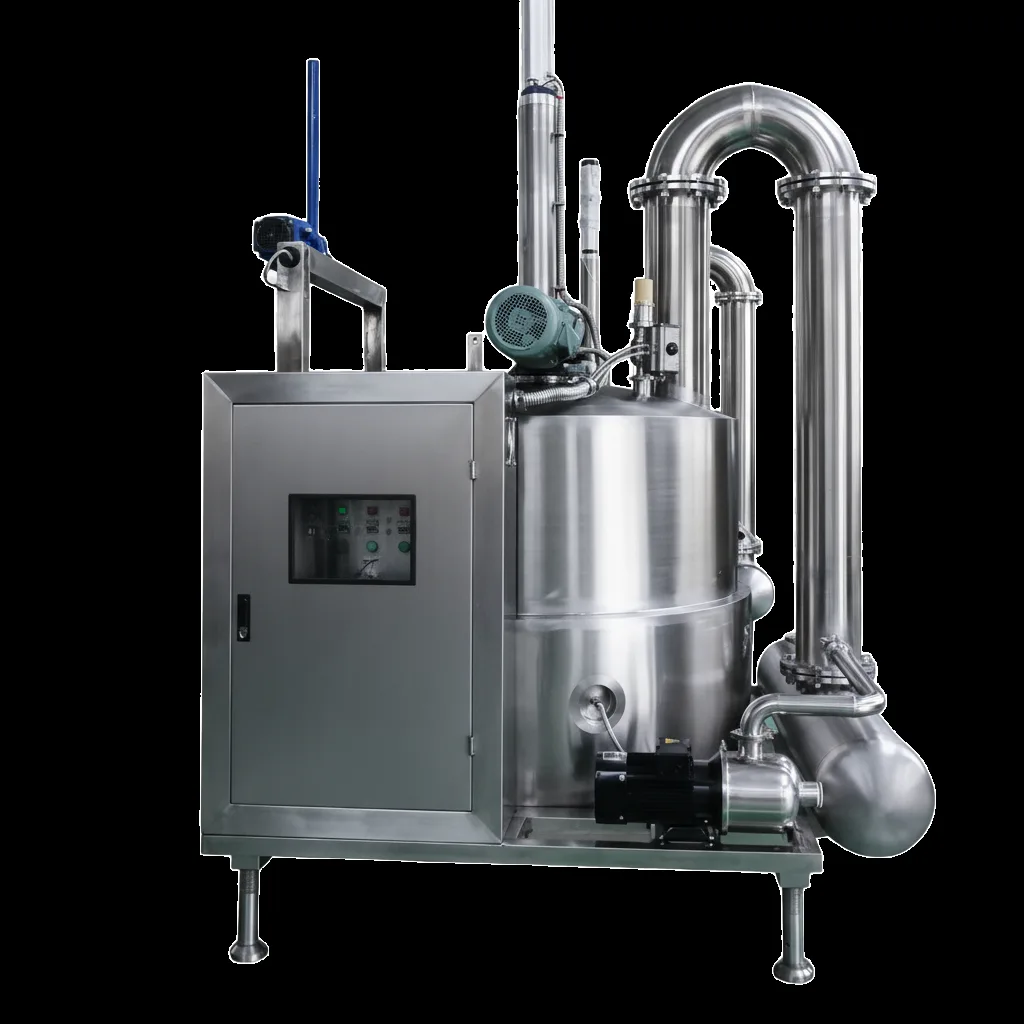
The right fryer depends on how much you plan to produce: a small producer making snack packs or trial batches can start with a compact model, while a factory supplying retail chains needs a larger vessel and basket.
Check four things. First, the basket and vessel: the basket must hold your batch in a single even layer, with room for oil to circulate. Second, the built-in centrifuge for de-oiling. Third, the controls: QS vacuum fryers use a Delta PLC with a MCGS touchscreen, so frying and spinning repeat from batch to batch. Fourth, cleaning: ask how the vessel, basket and oil system are cleaned.
QS vacuum fryer models
| Model | Batch capacity |
|---|---|
| QS-VF100 | 100KG/batch |
| QS-VF150 | 150KG/batch |
| QS-300 | 300KG/batch |
- QS-300 vessel: 2600mm (H) x 1600mm (D).
- Frying temperature: 80–100°C under vacuum.
- De-oiling: centrifugal, inside the chamber.
- Control: Delta PLC with MCGS touchscreen.
- Construction: 304 stainless steel.
- Warranty: 1-year warranty; lead time approx. 3 months.
Before you buy, run a trial batch of your own legumes on the machine you are considering.
Common mistakes to avoid
Most failed batches come from the same few oversights.
- Mixing sizes or varieties in one batch, so the pieces finish at different times.
- Overloading the basket to save a cycle, leaving middle pieces soft.
- Treating blanching as a universal step, instead of testing whether your product needs it.
- Copying settings from another product without testing them on your own legumes.
- Skipping or shortening the centrifugal spin, leaving surface oil on the pieces.
- Seasoning before de-oiling, so the coating washes off in the oil or burns.
Frequently asked questions
Which legumes are best for vacuum frying?
Chickpeas, broad beans and edamame are the most common choices, because they hold their shape and fry to a crisp, even texture at 80–100°C. Start with one variety and one size grade per batch, and test a small batch before scaling up.
Do legumes need soaking or blanching before vacuum frying?
It depends on the form. Dried chickpeas and broad beans are usually soaked before frying, while fresh or frozen edamame goes in without soaking. Blanching is standard for potato chips and fries and strongly advised for root vegetables, but it is usually not done for delicate fruits; for legumes it is a product-dependent option to verify — test it on your own product first.
How long does vacuum frying take for legume snacks?
There is no fixed frying time. The right moment depends on the variety, piece size, moisture and load, so never copy a time from another product. Watch the bubbling slow, check the colour against your own reference sample, and break a piece open to check the centre.
How should vacuum fried legume snacks be packed?
Pack them promptly once cool enough to handle, in a pack that blocks moisture and oxygen, and check the seal. Legume snacks absorb moisture quickly, so any delay softens the crunch. Follow the labelling and storage rules of your market.
Talk to us about your vacuum frying line
Tell us your product and target output — we will help you size the fryer. Explore the range on our vacuum fryer page.
Specifications are for reference only and are subject to the final supplied equipment.